Showing posts with label Attribute. Show all posts

Wednesday, 5 August 2015

Reporting On Low Stock Levels

To be able to create a report and be warned when a material is low on stock, a material attribute is needed.

Creating the minimum stock level attribute

To be able to create a low stock attribute, you must be an administrator, Go to Admin | Configuration | Edit Attributes as shown below.


Choose the material type as the entity type by using the drop down box.


Click add new to add a new attribute.


Change the name of the new attribute to Minimum stock level, change the group to Stock, change the type to Decimal Number, tick the show in list box and change the unit hint to kg so the new attribute should look like this:


Click save to save the new attribute. To have more detailed information on attributes, click here.

Setting the Minimum stock level for materials

Click on materials as shown below:


Right click on column headings and select Minimum stock level to display this attribute in the material list.


Right click on the material you want to change the low stock level and select open.


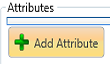
Click add attribute.


Select Minimum stock level and click the right arrow and close the dialog box with the small cross in the top right corner of the dialog box.


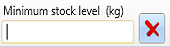
Enter the minimum stock level in the minimum stock level box.


Click save to save the minimum stock level.

Creating A Potential Stock Report

Click on reports and select Potential Stock Report (all materials).


This is a report on the stock of all materials. Materials highlighted on red are below the minimum stock level as shown below.


Thursday, 18 December 2014

Creating Custom Attributes


ColorPoint has built in fields for many common data requirements, e.g. material cost, job run lengths. Sometimes you may need to attach additional data to an entity in ColorPoint that isn’t part of the main application. To do this you need to use attributes.

What is an Attribute?

An attribute is a piece of custom data that you can attach to any of the main data entities in ColorPoint. The entities that we can define attributes for are: Material, Formula, Design, Job, Return, Dispense, Supplier, Customer, Address, Contact, Cylinder, Downtime Event, Machine, Substrate, Material Batch, VOC Area, VOC Type, and Campaign.

Creating an Attribute

To create an attribute, you must be an administrator. Go to Admin | Configuration | Edit Attributes as shown below.

image

Select the entity you are adding the attribute to.

image

The existing attributes for your entity will be shown.

image

Click “Add New” to create a new attribute. The following fields are available:

  • Name – The display name of the attribute
  • Group – A selection from predefined group names. You can define new groups if required. All attributes in the same group will be displayed together.
  • Type – To enable validation of data entered into attributes, the type is specified. Types available are:
    • Text – Any text
    • Whole Number – Only whole numbers, e.g. 1, 2, 3
    • Decimal Number – e.g. 1.234
    • True/False
    • Date
    • Email
    • There are a few more types used internally with special meaning.
  • Optional – If this attribute is added, whether it can be left blank or not. If it is not optional, the user will not be allowed to save a record without entering a valid value.
  • Protected – Only users with permission may edit this attribute.
  • Filterable – Can this attribute be used in the filter panel. Enabling filterable on a large number of attributes may impact performance.
  • Shown in list – Is the attribute shown in the main list as a column.
  • Priority – Where the attribute is displayed on the entry page.
  • Unit Hint – An optional unit that shows next to the attribute when you enter data to hint to the user what value they are entering.

As an example, we will create a new attribute on Materials, called SAP Code.

image

The name is SAP Code. The Group is “General”. The Type is Text. It is not optional (must be entered), and not protected. It is Filterable and Shown in list.

Using Attributes

Below you can see the SAP Code in use.

image

The SAP Code is a first class data member and can be filtered as shown below.

image