Showing posts with label Stock. Show all posts

Monday, 24 October 2016

New Console feature : Stop Weight


Following customer feedback, we have added a new feature to the console which allows the operator to define a Stop Weight. This is a weight value set against a tank. When the tank weight is at or below this weight OR the dispense you are trying to make will take the weight below this level, the dispense will be prevented until the tank weight is above the Stop Weight.

The main use case for this feature is to provide a “hard stop” to prevent stock from going below an acceptable minimum level. This is useful in scenarios where strict stock control is in place and the stock must never go below a defined amount, generally zero, however there is sometimes the need to ensure there is a minimum amount of stock in the tank that is above zero.

The feature is used as below:

To access the setting, go to the Supply Vessel Contents page (M005), select the desired tank and click Edit. You will see the below screen:

image

The default value of Stop Weight is not set, which means that dispensing will never be stopped regardless of weight. This behaviour is how the console worked prior to this feature being added.

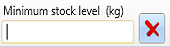
To set it, just select the field and enter a weight using the on-screen keyboard:

image

Once this has been set, if an attempt is made to dispense while the tank is below this weight or where the requested dispense amount will take the tank below the set amount, the stop icon will appear in the warning panel:

image

To proceed with dispensing, go to Supply Vessel Contents page and refill the tank so it is above the Stop Weight level. Dispensing will then be permitted to continue as normal.


This feature is available in version 1.9.34 and higher. If you are under a support contract that includes software updates, you can get this update for free by contacting support@rexson.co.uk.

If you are not under a support contract, contact sales@rexson.co.uk for a quote.

Wednesday, 5 August 2015

Reporting On Low Stock Levels

To be able to create a report and be warned when a material is low on stock, a material attribute is needed.

Creating the minimum stock level attribute

To be able to create a low stock attribute, you must be an administrator, Go to Admin | Configuration | Edit Attributes as shown below.


Choose the material type as the entity type by using the drop down box.


Click add new to add a new attribute.


Change the name of the new attribute to Minimum stock level, change the group to Stock, change the type to Decimal Number, tick the show in list box and change the unit hint to kg so the new attribute should look like this:


Click save to save the new attribute. To have more detailed information on attributes, click here.

Setting the Minimum stock level for materials

Click on materials as shown below:


Right click on column headings and select Minimum stock level to display this attribute in the material list.


Right click on the material you want to change the low stock level and select open.


Click add attribute.


Select Minimum stock level and click the right arrow and close the dialog box with the small cross in the top right corner of the dialog box.


Enter the minimum stock level in the minimum stock level box.


Click save to save the minimum stock level.

Creating A Potential Stock Report

Click on reports and select Potential Stock Report (all materials).


This is a report on the stock of all materials. Materials highlighted on red are below the minimum stock level as shown below.


Friday, 16 May 2014

Finishing Stock Batches

When a tank of raw material is used up and the weight falls to zero (or below), ColorPoint Manager highlights the batch in red. This is a hint to the user to check the status of the stock and if appropriate, to finish the batch to prevent it from being used again.

Used-stock-batches

Finishing the batch also keeps the Stock Overview tidy, showing only batches that are actually useful. To finish a batch, or a selection of batches, select the items from the list and right-click. Choose Finish from the contextual menu that opens.

Finish-stock-batches

If the Finish menu item is greyed out, this means there is a batch in your selection that is still allocated to a dispense valve. In this case, the normal refill procedure should be carried out first before finishing the batch.

Monday, 5 September 2011

How to Change out an empty supply vessel with CPM


Step One - Stock Receipt

  • Click ‘Stock Receipt’ on the tool bar.
  • Click the drop down arrow in the ‘Material’ box.
  • Click the material you have received.
  • Tab down to ‘Number of Packs’. This is the number of barrels/IBC’s you have received.
  • Enter the number of packs.
  • Tab down to ‘Pack Size’. This is the net weight of the product in the barrel/IBC.
  • Tab down to ‘Batch Number’.
  • Enter batch number.
  • Press ‘Save’ bottom right of screen.
  • Repeat process if necessary.

Once stock receipt data has been completed, the information will automatically be shared with the console.


STEP TWO - Changing supply vessel

  • Press the ‘E’ stop on the console. Locate the empty supply vessel and turn the air supply ball valve off at the pump in question.
  • Have the new supply vessel (Barrel/IBC) at hand.
  • Remove the caps from the new supply vessel.
  • Remove the ‘return tube from the empty supply vessel and place it in the new supply vessel.
  • Remove the suction tube from the empty supply vessel and place it in the new supply vessel.
  • Remove the empty supply vessel.
  • Push the new supply vessel in place.

If your system has cam locks and ball valves please close the valve before removing tubes/hoses.

NOTE: When removing the return and suction tubes from the empty supply vessel be aware that there will be product residue in/on the tube, so be careful not to spill any product on you or the floor.


STEP Three - Enter data

  • Enter RFID key.
  • Press ‘Materials’ (right of screen)
  • Press ‘Vessel Contents’ (Bottom of screen).
  • Using arrow keys (bottom right) high light the vessel/material you wish to replenish.
  • Press ‘Refill’ (right of screen).
  • Press the tab on the right of the ‘Batch’ box.
  • A batch list will appear. Using arrow keys (bottom right) High light the batch you want.

NOTE: This batch number must match up with the batch number on the Vessel you are about to place on the pump system.

  • Press ‘Select’ (top right).

The screen will change back to the ‘Enter refilled vessel weight when full’. You will notice that the batch number has changed and that you have a new vessel content weight. You will also see that you have an option to ‘Top-up with remnant weight’. This will default to ‘No’. Unless you wish to pour the remnants into the new supply vessel, leave the option as ‘No’ and press save.

  • Press ‘Save’

Once you have pressed ‘save’ the ‘Supply vessel contents’ screen will appear.

At this point pull the ‘E’ stop out and re-energise the console by pressing the green power button (top left of the console screen).

  • Whilst still on the ‘Supply Vessel Contents’ screen press ‘Recirc’
  • Go to the pump station and turn the air supply on to the pump.
  • Pump will come on and recirculate the new supply vessel contents for 2 minutes.

This will mix the product and help its fluidity, as the product has been standing for a time without any movement.

If you are part way the through dispensing, you will need to press continue once you have returned to the dispense screen.

Wednesday, 2 February 2011

Issue returns, materials and formulas on ColorPoint Manager


Returns are usually used at CPC by reworking into other formulas or issuing them directly to press. For convenience the returns may also be issued to press, booked against a job.

There are two ways of issuing items to a job. The first is job centric; find the job you are looking for, open it and use the ‘Issue to Job’ action. The second is better if you need to issue items across a number of jobs; open Tools | Issues | Issue to Job from the menu bar.

In the second option the job is selected from a drop down list allowing any job to be selected, in the first option the job selector is hidden as the job number is taken from the currently selected job.

clip_image001

The following details need to be selected or filed in to complete the issue:

  1. Screen: the screen on the press that the item is being issued to.
  2. Weight: the weight to be issued.
  3. Date: the date and time of the issue, defaults to the current time.
  4. Only show items that are part of this job: restricts the selection of items that may be issued to those that are already on the job items list. Un-ticking this option will allow you to book and formula to any screen and is not recommended unless you are certain it is required.
  5. The item type that is being booked to the job:
    1. Material: select a material and the material batch of the pack/barrel being used to supply it.
    2. Formula: Select the formula code that is being issued. This is used with pre-made formulas, or formulas that are already held in stock.
    3. Return: Select the required return from the list. The return stock will be debited with the weight issued.

Clicking ‘Reset’ will reset the form, clicking ‘Issue’ issue the selection and resets the form.

Friday, 21 January 2011

Receive and track stock on ColorPoint Manager

Once you have the raw materials defined on the system, the next step is to receive stock of these materials. The cost of a batch is set from the cost of the raw material at the time of the stock receipt. It is essential to do this before any dispensing takes place to ensure that all dispenses are automatically allocated to the correct batches. If this is not done, reconciling dispenses with material batches can become complicated.

Open the Stock receipt view:

clip_image002

1. Select the material to receive from the drop down list. Typing the first letter of the material will move the selection down the list to save scrolling on long lists.

2. Enter the number of packs or barrels to receive.

3. Enter the size of the packs or barrels. If you are receiving the same material in a number of different sized packs, enter the size of the most common pack here. You will be able to change it later.

4. Enter the supplier’s batch number for the materials. If more than one batch number is present in the delivery, enter the most commonly used on here. You will be able to change it later.

5. The date of the receipt will default to the current date and time. Change this if required. If you need to split a receipt across different dates, create a new receipt for each date required.

6. One batch per pack should be left ticked. If you really require all packs to be treated as a single pack please contact the support team to discuss this. This feature will be removed in a future version of CPM.

7. Consignment Stock assigns the consignment stock category to all of these packs if ticked. This is used in the stock valuation report to separate stock that is owned by the supplier from stock that is owned by the end user.

8. Create new batches is the default setting. Under this option you have the ability to adjust the batch numbers and weights of individual packs if required.

9. Add to existing batch will be removed in a future version of CPM. Use stock adjustments to increase the amount of stock received in and existing batch.

Save the batch. The form will be reset to receive the next batch.

As soon as stock batches are received they are available for selection on CPC. When refilling a tank, the batch can be selected from the material batches list.

All dispensed formulas take their traceability data from the stock batch that they were allocated to. This includes costing for use in the Job Costing Report. It is therefore essential that proper stock management is implemented if traceability or costing of product is important.