Occasionally it is sometimes necessary to replace all usages of a material within a formula with a new material that is replacing it. Rather than having to edit all the formulas which contain this material manually ColorPoint Manager contains a material replacement function which allows you to replace a material in either all or selected formulas.
BEFORE YOU START
Before you use the material replacement screen we very strongly advise you to make sure you have a back up of the manager database. Material replacements cannot be undone so it is important to have a back up you can go back to if you make a mistake. For more about backing up and making sure you have back ups available please see the entry
Backing up your data. It is also advisable to save any unsaved changes and close any formula windows you may have open.
SAMPLE REPLACEMENT
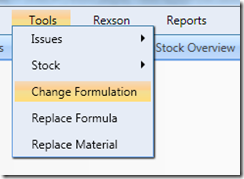
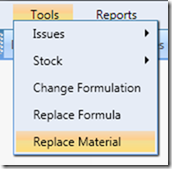
For this example we will replace a material with the code ‘old’ with a material with the code ‘new’. First we open up the material replacement screen by selecting ‘Replace Material’ from the Tools menu of ColorPoint Manager.
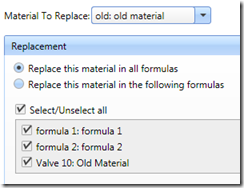
Next you need to decide whether you wish to replace the material in all formulas or just selected formulas. As you can see from the screenshot below, the default option is to replace the material in all formulas but if you select the ‘Replace this material in the following formulas’ option you can un-check the formulas where you do not want the selected material to be replaced.
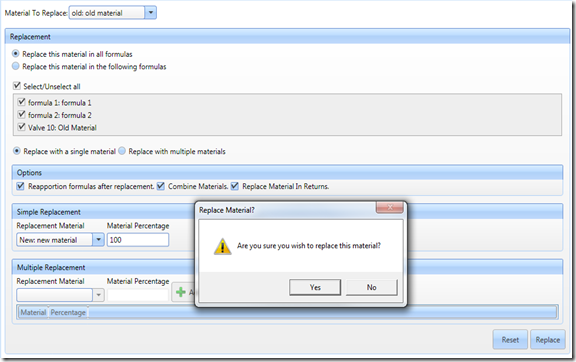
Next you should decide which of the following options you wish to use when replacing the material, as you can see all options are turned on by default.

There are 3 options that you can turn on or off depending on how you want the material to be replaced. The first option ‘Reapportion formulas after replacement’ reapportions formulas back to 100 parts if the total does not equal 100 parts after the material replacement. This should be kept checked unless your formulas do not total 100 parts.
The next option ‘Combine Materials’ determines what to do if the material you are replacing the old material with is already present in the formula. When this option is ticked it will add the old materials parts to the existing material. When it is not checked it will add the new material as separate item (i.e. if that material was in the formula once before it will be put in twice). This item should only be unchecked if there are some formulas that deliberately contain the same material twice.
The option ‘Replace material in returns’ is very important if you use returns on your site. If this option is not checked then the console will not suggest using any return that contains the old material with the formulas containing the new material. If the old material and the new material can be used together then you should leave this box checked.
ONE TO ONE REPLACEMENT
For this example we will do a straight one to one replacement of the old material with the new material as this is the most common form of replacement. Replacing a material with multiple materials will be dealt with in a separate post in the future. Simple replacement is already the default option so all we need to do is select the replacement material from the drop down and set the material replacement percentage.

The material percentage figure represents how strong the new material is in comparison to old material. In this example I’m using 100% which means that the new material is the same strength as the old material i.e. if a formula contains the old material at 50 parts it will replace it with the new material at 50 parts. If for example, the new material is twice as strong as the old material and you only need to use half as much of it then if you set the material percentage to 50 then if the old material uses 50 parts the new material will be added with 25 parts. At this point all you need to is double check that the correct options and materials are selected and press the ‘Replace’ button and confirm the replacement.
IF SOMETHING GOES WRONG
If you’ve made a mistake when replacing a material or didn’t get the result you wanted then it may still be possible to effectively undo those changes depending on what they were and how your formulas are set up. If this isn’t the case then it is best to contact Rexson Systems directly and we will either fix the problem or restore from your latest backup.
