Friday 2 August 2019

New Console Feature - Tank Batch Tracking


We've added new features to make it easier to monitor how long batches have been on a tank and provide warnings if the batch is approaching or has passed its expiry date.

 Configuring expiry dates

On ColorPoint Manager, add the "Shelf Life" attribute against a material and set its value to the number of days this batch will expire after being opened and attached to a valve.

Monitoring Batch Expiry

On the main page of ColorPoint console, a new button will be shown. When no batches are expiring, it will appear as below:


When there are one or more batches which are going to expire soon, it will appear as below:


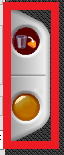
When there are one or more batches which have expired, it will appear as below:


Pressing on the button will take you to the Vessel Contents page. Here, the expired or expiring batches will be highlighted with different colored text for the amount of time they have been on the tank, orange is expiring soon, red is expired.
The information field can optionally be set to show the date the batch was assigned to the tank or the batch number of the batch that is on the tank.

Friday 19 July 2019

New Console Feature - System Health Checks

Dispenser downtime due to hardware or computer failures can be costly to your production, so we have introduced new features which will proactively warn the operator if it detects issues that may in future cause a problem.

The result of health checks are surfaced on the main menu when you first log in:

 The "heartbeat" icon in the top left will show green if no issues have been detected, orange if there are issues which could cause downtime further down the line, red if there are issues that could cause problems in the near future.

Pressing on the icon will take you to the Health page which shows the below information:


Last Boot: How long the system has been up since last boot
Version: Version of the software that is currently running.
Printer: Where CPC is configured to send Print Files.

Network: Shows all network adapters, their MAC addresses and current IP addresses. Connected adapters show in green, disconnected ones in red.

Health:

Disk Space: Shows the health of disk partitions, green if Ok, orange if running low on space, red if critically low.
File Maintenance: Offers early detection of build-up of Log or Print Files which indicate the normal automatic maintenance routines require attention.
Backup: Shows number of automated backups that are detected. Red if there are none, Orange if less than 3, green if more than 3.

Friday 5 July 2019

X-Rite IFS - Corrections with a job number


Can I send a correction via X-Rite to the ColorPoint console and link it to a job?


Yes it is possible by sending the job number with the formula code.
The formula code sent over in the Correction file needs to be of the following form

04798~2~00490
This breaks down as:
[job number]~[job item order]~[formula code]

The tilde ~ is the separator character.

The job item order part is the number where that formula appears in the list of items for the job.
In the example above the formula code 00490 is the formula being sent as a correction.  If the job is viewed in ColorPoint Manager then formula 00490 is item 2 in the job items list.


If formula 00440 was being sent instead then the formula code to be sent would look like
04798~3~00440

The job number remains the same but the formula code and its position have changed.

Tuesday 18 June 2019

ColorPoint Console - Toggle how Return is dispensed


When using a Return in a dispense, if one of the Returns can be used entirely the system asks whether you wish to use the Return vessel as the dispense vessel. 


If Yes (the tick button) is selected then an icon appears on the left of the dispense screen.


This icon indicates that the Return vessel is being used.  The dispense is set as a top up and all other materials will be dispensed on top of the existing Return.

If the operator wishes to pour the Return into another vessel instead then they can click on the button next to the icon and it will change to a different icon of the Return being poured. 


The dispense changes from a top up to a regular dispense and the manual dispense symbol appears next to the Return.


Summary

Use the Return vessel and top up all materials into this vessel
Use an empty vessel and pour the Return into it